

Peel-and-stick wallpaper: how to measure, order, and install like a pro
So, you’ve ordered a sample or roll of our wallpaper—amazing! We’re so excited for you to bring our designs into your space. Whether you're just testing colors or ready to install a full wall, this guide will walk you through everything you need to know to make the process as smooth as possible.
Why Choose Peel-and-Stick Wallpaper?
Every design in our shop is created with care—by us! Our wallpaper is printed by our trusted production partner, Spoonflower, on high-quality, removable peel-and-stick material. That means you get a beautiful, renter-friendly solution that completely transforms a space—without the long-term commitment of traditional wallpaper.
Whether you're making a bold statement on an accent wall, personalizing furniture, or adding charm to a small nook, our wallpaper is an easy way to bring more you into your home.
Step 1: Measuring Your Walls & Determining Roll Length
Before placing your order, take accurate wall measurements to ensure you get the right amount of wallpaper.
How to Measure:
Measure the height of your wall in inches.
Round up to the nearest available roll length: 12”, 36”, 72”, 108”, or 144”.
If covering multiple walls in the same room, use the tallest wall height to ensure all rolls match.
Refer to the diagram below for a visual guide on measuring width and height.

How to Calculate How Many Rolls You Need
Each roll covers a width of 24” (2 feet). Follow these steps:
Measure the width of your wall in inches.
If covering multiple connected walls, add up the total width of all walls.
Divide the total width by 24.
Round up to the nearest whole number to get the total rolls needed.
🔎 Want a quick way to calculate your rolls? Use Spoonflower’s wallpaper calculator to simplify the process.
Pro Tip: We always recommend ordering a sample first. It’s the best way to see the colors in your space and test adhesion on your walls. Plus, it lets you get a little sneak peek before committing!
Step 2: Prepping Your Space
A little prep work goes a long way in making installation easier.
Surface Preparation:
Wipe down your wall with mild soap and water to remove dust and grease. Let it dry completely.
Fill in small holes or cracks and lightly sand rough areas for a smooth surface.
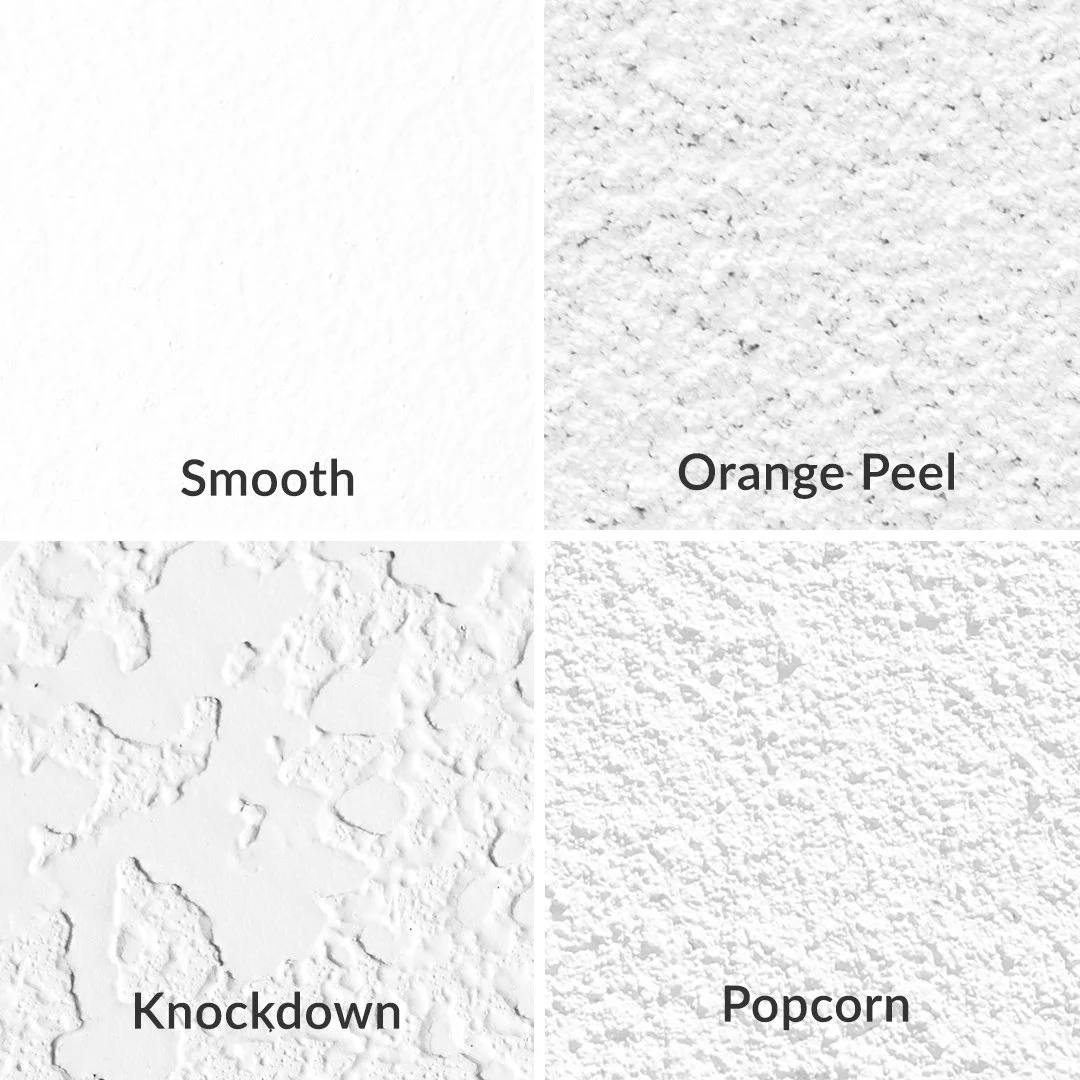
Check Your Wall Texture:
Peel-and-stick wallpaper adheres best to smooth, non-porous surfaces. If your walls are textured (like orange peel or knockdown), adhesion may be weaker.
Painted Walls:
If your wall was recently painted, allow at least 30 days for the paint to fully cure before applying wallpaper.
Avoid walls painted with washable, scrubbable, or No-VOC paints, as they can resist adhesion.
If needed, wipe the wall with a 30% isopropyl alcohol & 70% water solution to improve adhesion.
Step 3: Installing Your Wallpaper
Now for the fun part—let’s get that wallpaper up!
What You’ll Need:
✔ Measuring tape or level
✔ Utility knife or sharp scissors
✔ Squeegee or plastic smoothing tool
✔ An extra set of hands (helpful, but not required!)
Installation Steps:
Start at the top — Peel 6–12 inches of the backing off and align the top edge with your wall.
Smooth as you go — Press the wallpaper onto the wall, using your hands or a squeegee to smooth out bubbles.
Peel and press — Work in sections, peeling the backing off little by little while smoothing the paper down.
Align the next panel — Match the pattern as you move across the wall, slightly overlapping edges if needed.
Trim the edges: Use a sharp utility knife to cut excess wallpaper along the ceiling, baseboards, and outlets.
Installation Overlap Guide:
To ensure a seamless look, panels should slightly overlap to align the pattern correctly. The recommended overlap is about 0.5” (1 cm).
Pro Tip: If things don’t look quite right, don’t worry! Gently peel it back and reposition it before pressing it down again.

📌 Need a step-by-step visual? Spoonflower provides an in-depth installation guide in the video below.
Step 4: Enjoy Your New Space!
Once installed, step back and admire the transformation. Our peel-and-stick wallpaper makes it so easy to refresh a space, and we love seeing how you use it!
Need to Remove It?
When you’re ready for a change, simply peel it off—no residue and minimal-to-no damage (in most cases).
How to Remove:
Start at the top corner of a panel and gently lift.
Slowly peel downward at a 180-degree angle (parallel to the wall) to reduce the risk of paint damage.
Continue pulling with steady force until fully removed.
⚠ NOTE: If wallpaper has been up for a long time (1–2 years or more) or was installed in dry conditions, wall touch-ups may be needed after removal.
Frequently Asked Questions
-
It works well in low-humidity areas. However, avoid placing it in bathrooms with showers or bathtubs, as high moisture can weaken adhesion over time.
-
Make sure your wall is clean, dry, and smooth. Some paints, especially washable, scrubbable, or No-VOC finishes, may resist adhesion. If needed, wipe the wall with a 30% isopropyl alcohol & 70% water solution before applying. Testing a sample first is always a good idea.
-
Absolutely! Our wallpaper is perfect for giving dressers, bookshelves, and cabinets a fresh, custom look.